 |
| CROCHET http://www.ravelry.com/patterns/library/crochet-shark-hat |
 |
| KNIT http://www.knittingninja.com/patterns/shark-hat/ |
Not to knock either one, because I'd totally knit
the shark hat on the bottom, but the detail is so much more significant
on the crocheted version. I guess you COULD argue that the crocheter may be more skilled in the
craft than the knitter... but the knitted shark looks pretty well done to me! Overall (and this is not
a reflection of the person doing the work) I feel crocheting just
looks cleaner/deeper/crisper.
But... KNITTERS UNITE!!!
I love what I'm doing, what I've taught myself to do here. I just wanted to slip a little
whine in there, cause I wouldn't be me if I didn't!!
Moving on to MY projects...
I think one of the easiest, most basic things you can knit is a garter-stitched, straight scarf, and I say garter stitch because (personally) who wants a "front" and a "back" to their scarf?? In garter, the front and back are the same! So I deemed that as my next undertaking. Now let this be a lesson in "pretty isn't always practical or smart." I found this awesome looking yarn at my craft store:
 |
| 68% acrylic, 14% polyester, 9% mohair, and 9% wool. |
I snatched it up, and also grabbed two more pairs of straight needles, bringing my needle collection up to three pairs (3, 6, 10). The yarn was a little "fuzzy" and had these awesome iridescent mini sequins sporadically woven into the threads and I thought, "How fantastic would this look?!" :| no. This stuff was annoying as fffffuuuuu. The yarn itself was fairly soft, though a little too "hairy," but those damn sequins almost made me lose it. I probably casted-on **
*DISCLAIMER - for those of you who care: I'm well-aware that in today's grammatical society, "casted" in not the proper past-tense form for the word "cast," HOWEVER, for the sole purposes of explaining a knitting cast-on that I did in the past, I am using this word. I understand there may be disagreement, but I don't use "casted" in the past tense for any other definition of the word (she cast her spell, the fisherman cast his line, etc). I feel this is a special circumstance, especially because I choose to hyphenate the word cast-on when many others don't. I don't believe there is an all-encompassing knitting dictionary out there, so these will be my rules! Carry on -
** about fifteen times until I fully got a feel for how loose to make it to compensate for the coming, sparkly sequins. And once I did begin knitting, the worked yarn would snag against me or my hair or whatever stood in it's way, and it was just a disaster. BUT eventually, after many hours, I ended up deciding that my little cousin would LOVE a handmade gift all the way from Italy. And it sparkled; what little girl doesn't like sparkly stuff?! I casted-on 45 stitches to size 6 needles and worked in garter stitch (created by working every row in knit OR every row in purl) for about three feet. Simple and actually ended up looking pretty cute (and she LOVED it!). I do want to say that I love Patons yarn. It's a brand that's carried here on base, so I anticipate using it a lot. I really look forward to using their NON-sequin lace yarns for soft, delicate projects!!
- - - - - - - - - - - - - - - - - - - - - - - - - - - - - - - - - - - - - - - - - - - - - - - - - - - - - - - - - - - - - - - - - - - - - -
[March 23, 2015 EDIT]
**I'd like to note here that's it's important to read the label, not only for yardage and material, but for recommended needle size as well. As this was only my second time purchasing yarn, and I only had limited options, I did not pay attention that this yarn suggested using size 8 needles, which I did not have. Here's a basic yarn label, which also happens to suggest size 8 needles, as well: |
| Symbol chart: http://www.examiner.com/images/blog/wysiwyg/image/fabric-care.png |
YARN WEIGHT CATEGORY - I've noticed over my few years of knitting now that this is what is most referenced when pattern-hunting/yarn-foraging. And even after these years, I still find myself having to reference THIS site every time I purchase yarn. It helps to break down the "weights" (listed in 0, aka Lace, to 7, aka Jumbo, 0 being the thinnest/lightest yarn, often doing the more "delicate" types of work, and 7 being the thickest/bulkiest/heaviest yarn, often doing much larger projects). I've come to realize I use fingering yarn (1) and worsted yarn (3 or 4) more than anything else, and therefore the needles that get the most use are sizes 1 and 6! The more yarn you buy, the more you'll get a feel (literally as well as metaphorically) for what types of yarns do what types of projects. Typically you'll use wool for things that you want to stay warm (eg: hats, gloves/mittens, scarves, blankets, sweaters, etc.); it should be said that wool should not be machine-washed or dried with heat, as it will felt. Acrylic is the most affordable type of yarn, in my opinion, though it is man-made and sometimes scratchy/coarse. It is used for pretty much anything, excluding things made to withstand direct heat, such as potholders/oven mitts, as it is flammable. It holds its shape well, can be machine-washed, and is okay to dry, but on a low setting. Doing research on different materials and even looking at the suggested yarn used in patterns before deciding what to knit can help you gain a better understanding of yarn.
And as a direct result, the more yarns you use, the more needles you'll own. As previously stated, each type of yarn weight requires/suggests you use a particular size needle. For example, you don't want to try knitting a chunky blanket on size 2 needles! And over these few years I have certainly acquired many needles (and I itch to add more everyday!!)
 |
| You'll notice my 6s and 13s are missing - I'm currently knitting a seamless baby sweater and a big ole blanket! You'll see them soon!! |
- - - - - - - - - - - - - - - - - - - - - - - - - - - - - - - - - - - - - - - - - - - - - - - - - - - - - - - - - - - - - - - - - - - - - -
Moving on...
Before 2013 ended, I wanted to knit a Christmas present or two, and ended up setting my sights very high! I found a pattern for super cute knee-high socks that I figured my brother's girlfriend and my knitting friend would love for Christmas. I also found the day-of-birth gift I wanted to make for my cousin (who'd already received the little booties I'd made as my first project)!
For the socks I was making for my brother's girlfriend, I ended up doing the pattern exactly as stated (substituting in a different yarn of course), but for my knitting friend, I decided to try my hand at creating "my own" socks. Check out the more detailed post HERE, including my version of a pattern (eeekkkk!!) on this post: Dr.Who Knee Socks.
 |
| Here is the big ole boy a year later wearing the vest I made him! |
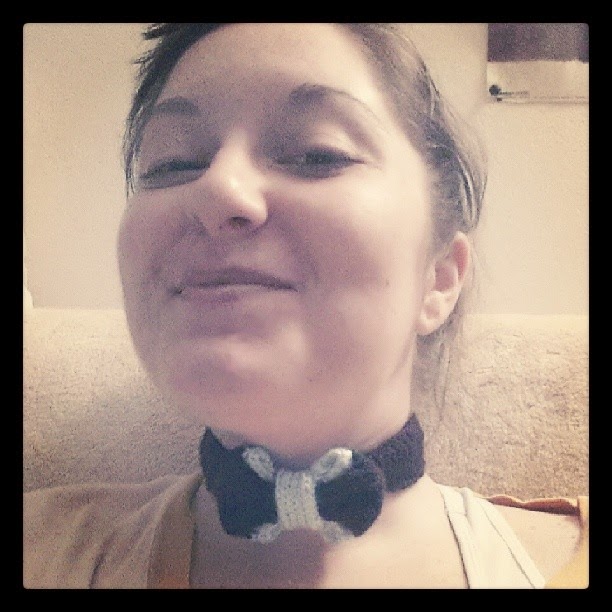 |
| Pardon my big ole face - but here's the tie! |
And that only leaves the gifts: vest and bow tie.
vest was definitely a challenge, but it was a simple enough
pattern. The most difficult thing for me was attaching the
individual pieces, which is odd because I've been sewing
since I was friggin ten years old! The only change I made was
to the bow tie, adding a small band with a button and buttonhole
so that it could be worn around the neck like an actual bow
tie. I casted-on about 12 stitches, then followed this:
(RS) K whole row
(WS) P2, K8, P2
Repeat for desired length (long enough to wrap around your
neck, stopping at some point to make a buttonhole (at least
five rows from end). On buttonhole row:
(RS) K4, K2tog, YO, YO, SSK, K4
(WS) P6, P into back of loop, P5
Complete final five rows in original pattern
Bind off and sew on a button.
Again, no forethought for me to get pics right
away/better quality (I'll try to do better), but I did
get pictures nonetheless. I hope you enjoy this little outfit!
That compromised my Christmas knitting. I'd found what I'd chosen to do challenging enough to take a break for a bit. I'm already thinking up my next project, possibly birthday presents for my cousins/brother in February/March! In any case, this isn't the last you'll see of my knitting!!!
Until next time...
- - - - - - - - - - - - - - - - - - - - - - - - - - - - - - - - - - - - - - - - - - - - - - - - - - - - - - - - - - - - - - - - - - - - - -
[March 23, 2015 EDIT]
**Note about working in the round: DON'T USE CIRCULAR NEEDLES! Seriously though, it's totally not necessary, unless your project is just HUGE! (The circular needles I have can actually be used interchangeably/independently, and I typically use them as "straight" needles for really long projects like the shawl I made for my grandmother in my 2014 Christmas post). Instead, a little trick my knitter friend taught me :) spread your work over three or four DPNS (double-pointed needles) like this:
Determine your number of stitches and divide by the number of needles you'll be using. So for this example, I had to cast-on 24 stitches over three needles, so 8 stitches per needle. For something this small, the less needles, the easier, especially because my size 6 needles are long. So I casted-on 9 stitches to my first needle, then picked up my second needle, carefully slid the last stitch to the new needle and casted-on 8 more stitches. Then again, I picked up my third and final needle, slid the last stitch from needle two onto needle three, and casted-on 8 stitches. Now you may be counting and saying, but that makes 25 stitches. Ah-ha you are correct. With the final, extra stitch, you'll be joining your work by sliding the very first stitch you created from needle one (needle that should be in your left hand) to the end of needle three (should be the needle in your right hand), being very careful not to twist your work. Then you will pass the last stitch you created (now your second stitch on the third/right-hand needle) up and over that stitch you just moved. Then pull tight and you've joined your work for in-the-round. Count your stitches to make sure you have 24, then mark the beginning of your work with a stitch marker/holder so you know where your round begins, and get to work!
